Wednesday 31 December 2014

New Years Eve Nail Art Looks


Hey everyone,
                        Happy New Year !! ( In advance lol). Today as it is new years eve I have two nail looks to share that will be suitable for tonight's festivities. This post will not include step by step instructions but a brief description of each look. Lets get on to the nail art !


Look #1; For this option I started with a rose gold base and dabbed on some black polish using a make-up sponge. Next, I made a few dots using a small dotting tool.


Products used:
L.A Girl: Obsidian
Orly: Rage
Top Coat- Seche vite fast drying top coat


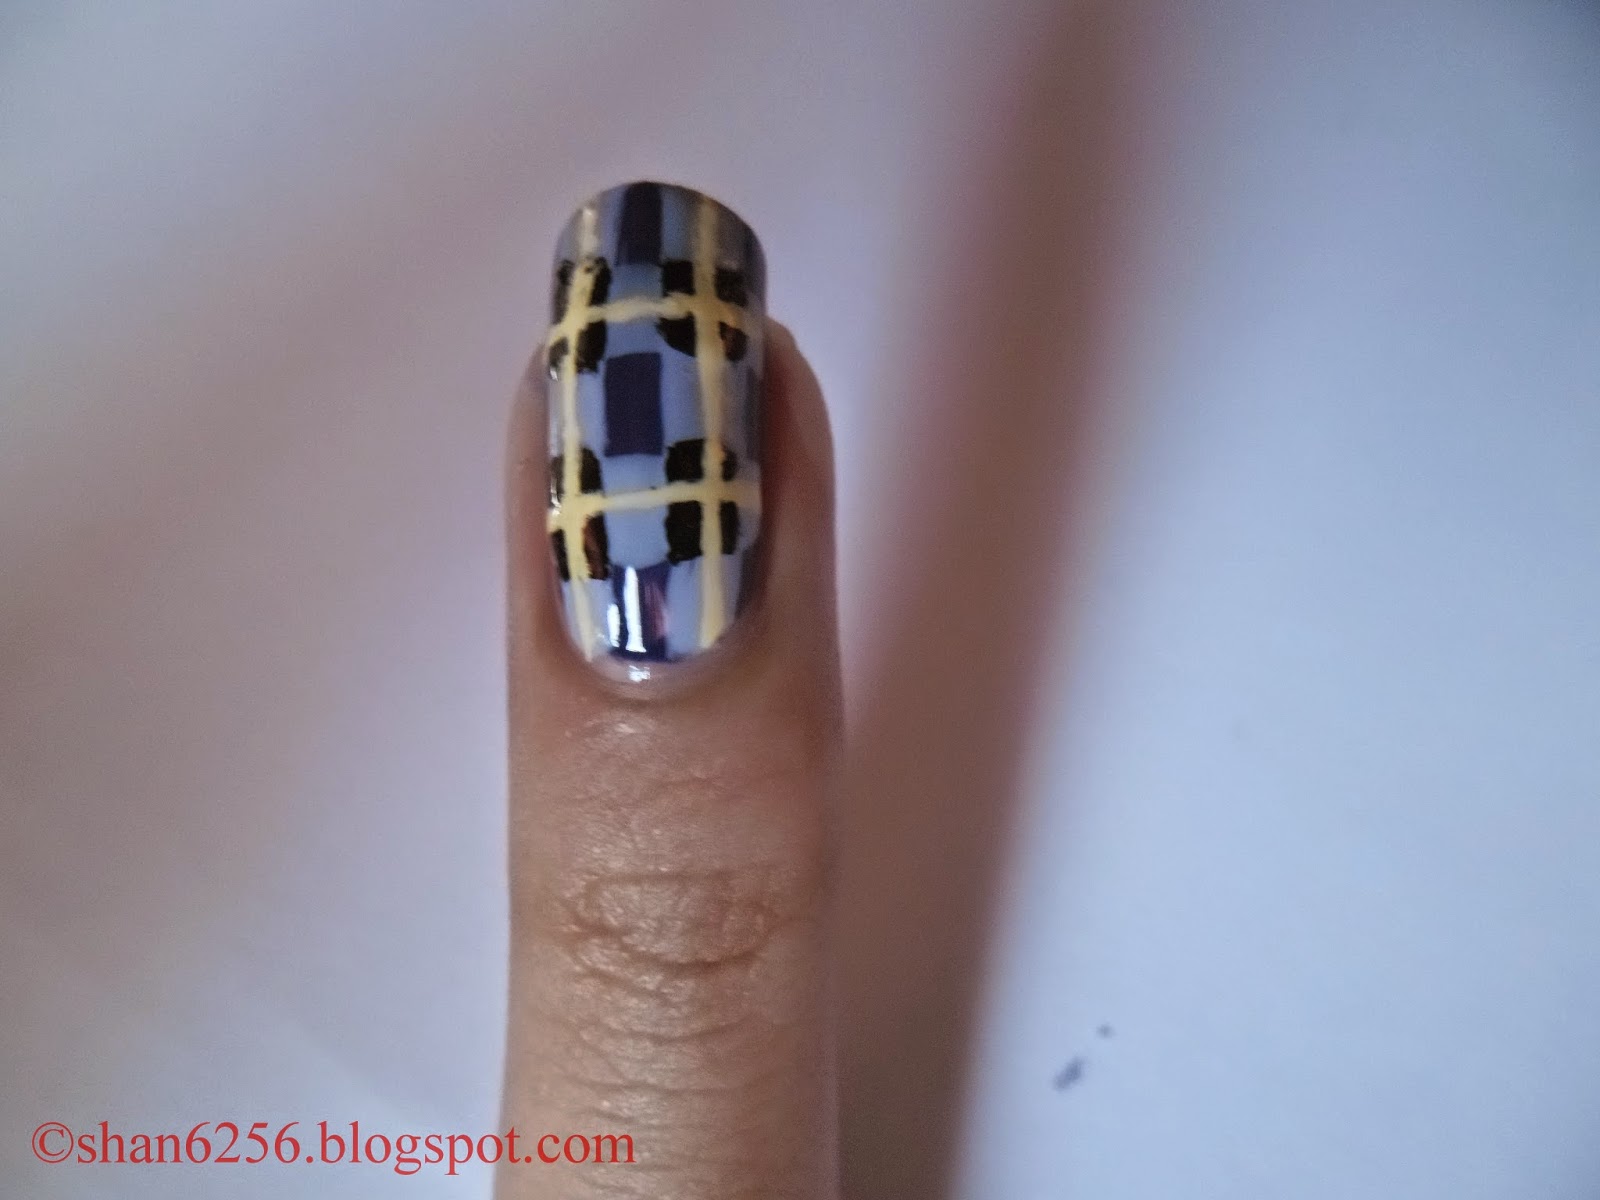
Look #2: Firstly, on my middle and ring finger I created the pattern using striping tape, gold polish and black polish. On the remaining nails I began with a gold base like the rest and placed four dots vertically down each nail.


Products used:
China Glaze: Mingle with kringle
L.A Girl: Obsidian
Top Coat- Seche vite fast drying top coat


Thank you for viewing this tutorial and check out my other posts on this blog. Feel free to leave a comment and share this page with your family and friends. Also, look out for another tutorial soon. Enjoy the rest of your day and have a great 2015 :D !


See you soon.


Ciao,
Shannon.


Friday 26 December 2014

December Manicures


Hey everyone,
                        Today I have my December manicures to share. Most of them relate to the Christmas season and I enjoyed wearing them over the month. In addition these looks were all very simple to execute. Let’s get on to the manicures enjoy !


Manicure #1


Products used:
Art club nail striper: white
Essie: Style hunter
Maybelline Color Show: Sequins


Manicure #2


Products used:
Essie: Blue rhapsody
Sinful colors: Snow me white


Manicure #3


Products used:
Essie: Cute as a button
Orly: Gumdrop


Manicure #4


Products used:
Essie: Style Hunter
Orly: Gumdrop
Slick: Disco Ball 52


Manicure #5


Products used:
China Glaze: Luxe and lush
Essie: Matte about you top coat
Essie: Smokin' hot


Thanks for viewing this post :). Feel free to leave a comment and share this page with your family and friends. Look out for another upload next week, enjoy your weekend and the rest of the holiday season!


See you soon.


Ciao,
Shannon.


Sunday 21 December 2014

Snowflake Nail Art Tutorial


Hey everyone,
                        Welcome back to my blog, I hope you all are enjoying the Christmas season :). Today I have another simple tutorial which coincides with this time of year. In addition to your nail polishes you will need a thin nail art brush. Also, be sure to start off with a base coat to protect your natural nails. Let’s get on to the tutorial!


Step one: Create a 'cross' shape using a thin nail art brush and white polish on the painted nail.


Step two: Create two diagonal white lines to form a star shape.


Step three: Next, paint on two short lines extending from the edge of each line that makes up the star as shown. Place a sizeable dot in the middle of the star shape.


Products used:
Art club nail striper: white
Essie: In the cabana


Thank you for viewing this tutorial and check out my other posts on this blog. Feel free to leave a comment and share this page with your family and friends. Also, look out for another post soon. Enjoy the week and have yourself a Merry Christmas :D !


See you soon.


Ciao,
Shannon.


Monday 15 December 2014

Christmas Present/ Gift Nail Art Tutorial


Hey everyone,
                        Welcome back to my webpage, I hope you all are enjoying the Christmas season :). Today I have another simple tutorial which coincides with this time of year. In addition to your nail polishes you will need a thin nail art brush. Also, be sure to start off with a base coat to protect your natural nails. Let’s get on to the tutorial!


Step one: Begin by painting your nail in the desired colour and create a box using a thin nail art brush and red polish.


Step two: Fill in the square with red polish.


Step three: Next using a silver polish and a thin nail art brush create a 'cross' shape on the box and outline the four sides.


Step four: At the top of the present add two curved lines to represent ribbon tied into a bow.


Products used:
Essie: Style Hunter
Orly: Gumdrop
Slick: Disco Ball 52


Thank you for viewing this tutorial and check out my other posts on this blog. Feel free to leave a comment and share this page with your family and friends. Also, look out for more Christmas tutorials. Enjoy the season :D !


See you soon.


Ciao,
Shannon. 


Monday 8 December 2014

Christmas Tree Nail Art Tutorial


Hey everyone,
                        The Christmas season is here and I am overjoyed because its my favourite time of year. And one way to celebrate this wonderful time is with Christmas inspired nail art. Over the next few weeks I will be posting tutorials fit for the season. Today I will be sharing a Christmas tree design however, it will not be a full manicure. In addition to your polishes you will need a thin nail art brush. Also, be sure to start off with a base coat to protect your natural nails. Let’s get on to the tutorial!


Step one: Begin by painting your nail white then using a thin nail art brush dipped in green make triangle towards the tip of the nail. Next, create two layers following this triangle with each layer being wider than the previous one.


Step two: Fill in the area with green polish and create a thick line in brown to represent the tree trunk.


Step three: Next, using the nail art brush dipped in silver make lines going across the tree to represent a string of lights.


Step four: Add colourful dots on tree to represent ornaments and a gold spot at the tip of the tree to act as a star.


Products used:
China glaze: call of the wild
China glaze: starboard
China glaze: swanky silk
Essie: cute as a button
F21 nail polish: Baby blue
Slick: Disco ball 52


Thank you for viewing this tutorial and check out my other posts on this blog. Feel free to leave a comment and share this page with your family and friends. Also, look out for more Christmas tutorials soon. Enjoy the season :D !


See you soon.


Ciao,
Shannon.


Friday 28 November 2014

November Manicures


Hey everyone,
                        Today I have another addition of my monthly manicures. This month flew by so quickly and I did a few intricate looks but kept it plain for the most part. Also, I would like to mention that I have a few Christmas related tutorials coming soon so be sure to check the blog during December for those. Anyway, without any further ado let’s get on to the manicures enjoy !


Manicure #1


Products used:
L.A Colours (nail stripper): black
 L.A girl metal: Obsidian


Manicure #2


Products used:
Orly: Rage


Manicure #3


Products used:
F21: Baby blue
 L.A girl metal: Obsidian


Manicure #4


Products used:
China Glaze: Fairy dust
Essie: Go Overboard


Manicure #5


Products used:
China Glaze: In a lily bit
Maybelline Colour Show: Sequins


Thanks for viewing this post :). Feel free to leave a comment and share this page with your family and friends. Look out for upcoming weekly tutorials over the Christmas season, enjoy your weekend!


See you soon.


Ciao,
Shannon.


Friday 21 November 2014

Rainy Days Nail Art Tutorial


Hey everyone,
                        I hope you all are doing well :). This week we've had some pretty gloomy weather where I live so its inspired me to do a 'rainy days' tutorial. In addition to your polishes you will need a nail striper and dotting tool to do this design. Also, be sure to start off with a base coat to protect your natural nails. Let’s get on to the tutorial!


Step one: Paint all of your nails in a medium blue.


Step two: Next, on the middle finger create an umbrella design. First, begin by making a semi- circle towards the top and three lines of different lengths coming down from the semi- circle. Connect the edges of lines in a zigzag motion. Finally, the handle; make a straight line and a curved end near the cuticle.


Step three:  On the remaining nails create a dark cloud and rain drops. First, using a grey polish and a large dotting tool, make connecting circles until a cloud shape is formed. Next, using a striper and white polish and create short lines falling from the cloud.


Step four: Clean up around your nails to remove any polish from the skin and add your preferred top coat to smooth out design and add shine.


Products used:
Art club nail striper: white
China glaze: Pelican Grey
Essie: Hide and go chic
Top Coat- Seche vite fast drying top coat


Thank you for viewing this tutorial and check out my other posts on this blog. Feel free to leave a comment and share this page with your family and friends. Also, look out for another tutorial soon. Enjoy your weekend :D !


See you soon.

Ciao,
Shannon.


Friday 31 October 2014

October Manicures


Hey everyone,
                       I hope you all are doing great :). Today, I have my October manicures to share. During this month I experimented a bit with caviar beads and stamping plates and I was really satisfied with the results. I also did some simple looks so there's a little something for everyone.  Let’s get on to the manicures enjoy !


Manicure #1


Products used:
China Glaze: Swanky silk
Ciate (caviar beads): Cookies & cream
Essie: Topless and barefoot


Manicure #2


Products used:
Essie: Fiji
Essie: Mint candy apple
Essie: Matte about you top coat
Sally Hansen: Vanity flair


Manicure #3


Products used:
Essie: For the twill of it
Orly: Rock solid


Manicure #4


Products used:
China Glaze: In a lily bit
Essie: Cute as a button
Sally Hansen: Green with envy
Sinful Colors: Snow me white


Manicure #5


Products used:
L'oreal: VIP status
Shany: Stamping plate
Slick: Disco ball 52


Manicure #6


Products used:
China Glaze: Flip flop fantasy
F21: Black & white glitter


Thanks for viewing this post :). Feel free to leave a comment and share this page with your family and friends. Look out for another upload next week, enjoy your weekend!


See you soon.


Ciao,
Shannon


Tuesday 21 October 2014

Plaid Inspired Nail Art Tutorial


Hey everyone,
                        I hope you all are doing well :). Its been a while since I've uploaded a tutorial so today I have a simple plaid design to share. For this tutorial you will need a thin nail art brush in addition to your polishes. Also, be sure to start off with a base coat to protect your natural nails. Let’s get on to the tutorial!


Step one: I began by painting three of my nails white and two in dark purple. (The plaid design will be on the nails painted in purple)


Step two: Next, using a light purple polish make two thick vertical lines along the nail. This can be done using the actual nail polish brush.


Step three: Make two thick horizontal lines over the lines previously made in step two.


Step four: In the areas where the vertical and horizontal lines meet, create black squares.


Step five: Next, using a thin nail art brush and yellow polish create thin vertical and horizontal lines over the black squares and light purple sections.


Step six: Clean up around your nails to remove any polish from the skin and add your preferred top coat to smooth out design and add shine. 
*As you can see on the nails polished in white I drew a couple of stripes. 


Products used:
L.A Colors (nail stripper): black
Opi: Do you have this color in stockholm?
Orly: Lemonade
Sally Hansen: White on
Sinful Colors- Candy coated
Top coat- Seche vite fast drying top coat


Thank you for viewing this tutorial and check out my other posts on this blog. Feel free to leave a comment and share this page with your family and friends. Also, look out for another tutorial soon. Enjoy your weekend :D !


See you soon.


Ciao,
Shannon.


Sunday 28 September 2014

September Manicures


Hey everyone,
                       I hope you all are doing well :). During the month of September I got a couple of new polishes so I have been painting my nails frequently. Also, I know that around this time of year darker nail colours are preferred due to the fall in temperatures in some countries. However, where I live this change doesn't affect me so throughout the post you will see both bright and dark manicures. Let’s get on to the manicures enjoy !


Manicure #1


Products used:
Essie: Bikini so teeny
Essie: Blue rhapsody


Manicure #2


Products used:
Essie: Cute as a button
Sally Hansen: White on


Manicure #3


Products used:
China Glaze: Shocking pink
Essie: Tart deco
F21: Baby blue
Orly: Lemonade
Sally Hansen: Green with envy
Sinful Colors: Candy coated


Manicure #4


Products used:
China Glaze: Swanky silk
Opi: Visions of love


Manicure #5


Products used:
Jordana: Purple glam
Sally Hansen: Vanity flair


Manicure #6


Products used:
Essie: Cashmere bathrobe
Maybelline Color Show: Denim dash


Thank you for viewing this post and check out my tutorials on this page. Feel free to leave a comment and share this page with your family and friends. Look out for a tutorial next week and enjoy the rest of your day :) .


See you soon.


Ciao,
Shannon.